Wiring, where to start....
Ok, I did the wiring diet myself and in the process re-wired a
lot of the dash area of the wiring. One of these days I will
make a more comprehensive tutorial but for now you'll just have
to follow along the pictures and kind of figure it out yourself
as you go along. Actually customizing the wiring in your car is
not that hard. Sure it takes a long time and is a pretty dirty
job, but the payoffs in the end are worth it. You will know
exactly where each circuit goes and will therefore be able to
easily diagnose electrical problems in the future. It will also
be a cleaner install with fewer extra wires. I suppose it weighs
less too....but there are easier ways to strip weight from your
car (yourself :).
Let me say this as a
warning. If you have very little electrical experience and have
no real interest in learning, do yourself a favor and pay
someone to do it. Also, if you don't have 10+ hours to spend on
the wiring pay someone to do it. This can be a very frustrating
process for a rookie electrician like myself and truthfully,
this was the hardest step for me in building the whole car. It
required the most time and the most effort to get it to work
right.
Click Pictures to
Enlarge
I'll
start with the dashboard. I wanted to be able to easily connect
and disconnect the dash so I used some molex connectors from
radio shack and wiring all the dash electrics through them.
NOTE: the radio shack connectors suck. I will replace them soon
with weatherpack. I got them from
delcity.com and suggest you do the same.
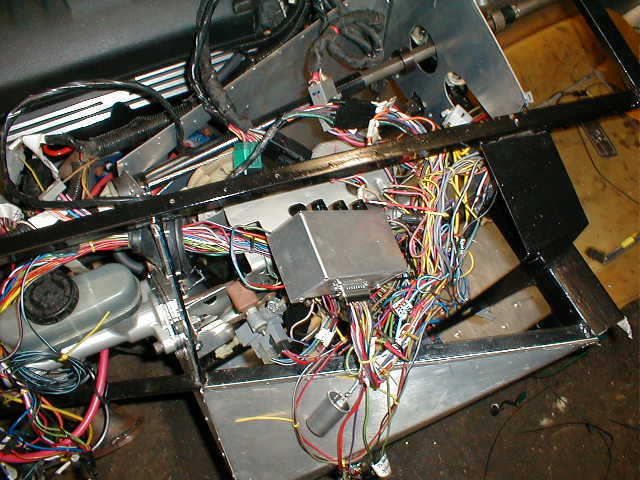
This was my first black box. The connector was was too small and
it ended up just not working. Notice the mess of wires though!!!
New black box can be seen by clicking this
Battery cable unwrapped through the tranny tunnel
shot
of the rear wiring
another shot of the rear wiring. Notice the extra wire for the -
batt terminal for dropping the battery.
Thermostat
control for the electric fan. I paid way to much for this but I couldn't find it at autozone. What's not shown is that its
wired directly to the + ignition solenoid with a heavy gauge
wire.
I
modified the coil bracket so I could mount it on the 3/4"
tubes so its out of the way but still looks good.
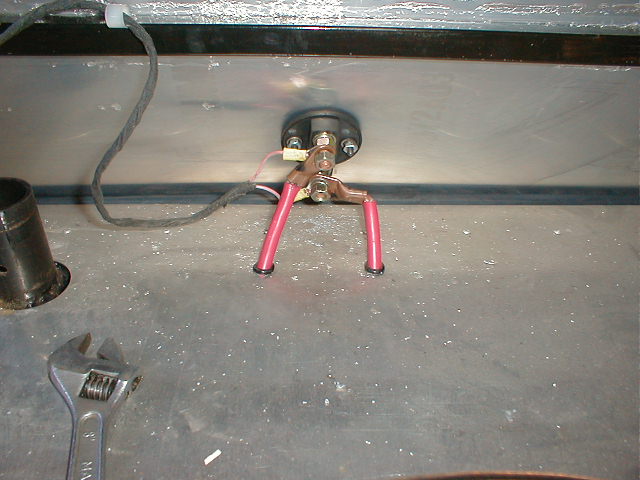
Cutoff switch to be mounted in the aluminum panel between seats
Here
it is mounted
Interior wiring. Notice that I mounted the computer to the inside
of the firewall,
simple fuse panel I got from autozone. Much simpler than the
mustang one.
another shot of the fuse panel.
looks
like fun eh?
Since
the pictures are confusing, I made up a simple (well) wiring
diagram for everything that I added. You can follow it if you use
my black box or a modification of it.